Welcome to help center
FAQ's
Product Troubleshooting
FAQ's
MowRo: How To Replace The Mowro Button/LCD Cover?

Are you looking to replace the button/LCD cover on your MowRo robotic mower? Below are step-by-step instructions on how to remove and replace the cover.

Tools and Materials Needed:

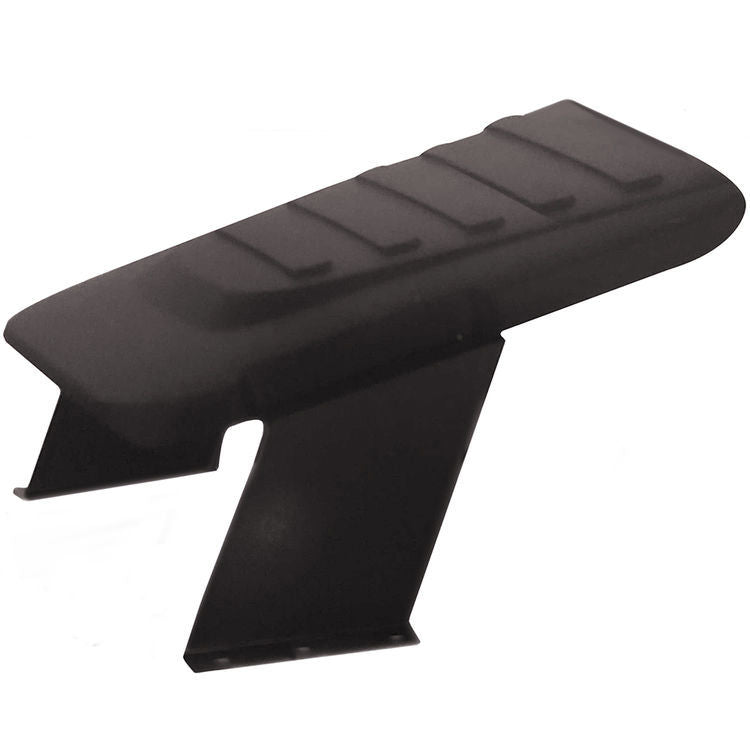
  • Replacement Button/LCD Cover
  • Flat Head Screwdriver

Procedure

  1. Using a flat head screwdriver, remove the cover by pushing the cover to the right side.
  2. Put the screwdriver tip behind the cover's left side (where the hole is) and gently push the cover off with the screwdriver.
  3. Once the left side is off, remove the right side by sliding off.
  4. To put the new cover back on, start by sliding the hole over the notch on the right side.
  5. Press the cover to the right side as far as possible.
  6. Move the hole on the left side of the cover over the notch on the right side - it will slide through and your cover is now installed.

Did this answer your questions?

Thank you for your feedback

FAQ's
MowRo: How To Replace The Outer Cover?

If your MowRo sensors are damaged, you may need to replace the outer cover. Replacing an old or damaged outer cover is necessary to ensure that your MowRo will work in its best condition and provide a safe navigation experience. You can easily get a replacement on the Redback tools website.

Tools and Materials Needed:

  • New Outer Cover
  • 10mm Socket Wrench.

Procedure

  1. Flip the MowRo over and loosen the four bolts on the bottom of the unit using a 10mm socket wrench.
  2. Once loosened, flip the MowRo back over and tilt its outer cover forward to expose all screws holding it in place.
  3. Unscrew two screws that are holding the charging contact cord in place.
  4. Unscrew the three screws (six total) on both charging contact covers.
  5. Remove the charging contacts from its cover and remove the old outer cover completely.
  6. Finally, replace it with a new outer cover and reverse the steps above to re-install it correctly.

Did this answer your questions?

Thank you for your feedback

FAQ's
MowRo: How To Replace The Button Sticker?

It is important to make sure that all of the buttons are clearly labeled and easy to use. Luckily, with a few simple steps, you can easily replace the button sticker on your robot mower and have it looking as good as new in no time!

Tools and Materials Needed:

  • Replacement Stickers
  • Knife

Procedure

  1. Insert the knife blade underneath the old button cover sticker, it is easiest when inserting on the edge of the old button cover sticker.
  2. Lift up and pull back the old button cover sticker using the knife to lift it off of the mower.
  3. Remove the old button cover sticker completely from its place on your robot mower.
  4. Line up the new button cover sticker and ensure that it is properly aligned before applying.
  5. Remove the backing on the sticker and place the new sticker down onto your robot mower, making sure to rub out any bubbles or wrinkles with your finger or a cloth as you go.
  6. Once all of the bubbles are smoothed out, the new button sticker should be firmly in place and looking great! 

Did this answer your questions?

Thank you for your feedback

FAQ's
MowRo: How To Replace The Battery?

Replacing a battery in your MowRo lawn mower can be necessary for various reasons. It could be due to an old or faulty battery, or it may just need replacing as part of regular maintenance. You can order a replacement battery directly from MowRo, and we'll show you how to replace it easily.

Tools and Materials Needed:

  • Phillips screwdriver
  • Replacement battery

Procedure

  1. Begin by flipping the MowRo over onto its back so that you can access the underside.
  2. Unscrew the four screws which are holding down the battery compartment.
  3. Remove the battery compartment cover and set it aside.
  4. Remove the old battery from inside the compartment and dispose of it safely.
  5. Insert the new battery into the compartment, ensuring it is fully inserted.
  6. Put the battery compartment cover back on and secure it with the four screws.
  7. Flip the MowRo over and test its power by turning it on to ensure a successful replacement! 

Did this answer your questions?

Thank you for your feedback

FAQ's
MowRo: How To Grease MowRo's Wheels?

MowRo's wheels are essential components of the machine, providing traction and maneuverability. If your MowRo's front wheels start becoming squeaky or you get an error code E2, it is likely time to grease them.

Tools and Materials Needed:

  • Aerosol grease with a small spray "straw."
  • Shop Rag
  • Paper Towels 

Procedure

  1. Flip the MowRo over so that it is upside down on the ground.
  2. Lift the front wheel and remove any debris or old grease around the rubber gasket with a shop rag.
  3. Insert the "straw" of the aerosol container under the rubber gasket and spray an even layer of grease over the bushing.
  4. Push and pull the front wheel up and down to ensure the grease reaches all the bearings inside.
  5. Wipe any excess grease with a paper towel before repeating this process on the other wheel.
  6. Once both wheels have been greased, flip the MowRo back over, place it back in the docking station, and manually start it. 

If your robot mower still displays the E2 error message, even on a flat surface, after applying grease, document the issue with a brief video and capture a photo of the serial number. To receive further assistance, please get in touch with customer support and complete the required form.

Did this answer your questions?

Thank you for your feedback

FAQ's
MowRo: How To Adjust MowRo Cutting Height?

Changing your MowRo mower’s cutting height is easy and can help you get the perfect lawn. Here are the steps to follow:

  1. Make sure that your MowRo Mower is in the ‘OFF’ position.
  2. Open the front screen cover and locate the orange knob.
  3. The orange knob is used to adjust the mower’s cutting height. The higher the number is, the higher the cutting height will be. The lower the number, the lower the cutting height will be.
  4. Twist or turn the orange knob until you reach your desired cutting height setting.
  5. Once you have chosen your desired setting, firmly close the screen cover, and you’re ready to mow! 

Did this answer your questions?

Thank you for your feedback

FAQ's
App-Enabled Features

Download and set up the Robot 2 Mow app to get the most out of your MowRo lawn mower. The app is available via Google Play Store and Apple App Store as it is compatible with both Android and Apple mobile devices, giving you unlimited options to operate your mower on whatever device you own or prefer to use. It will allow you to fully customize your mowing experience and ensure that your robot is always running at peak performance. Here's a brief rundown of how to get started: 

1. Download the Robot 2 Mow app from your app store.

2. Add your robot mower model to the app by following the instructions in your manual that are also attached to this article.

Listed below are some of the features of the Robot 2 Mow app. You can also watch our video to learn more.

  1. Check if your MowRo is out cutting the grass or charging
  2. Schedule the day and time you want MowRo to mow. 
  3. Check the charging status of MowRo. 
  4. Select the size of your mowing area
  5. Be notified of any error codes. You cannot start the MowRo from an error on the lawn.
  6. Easily change your security pin code. 
  7. Send your MowRo to the docking station any time.  

With the Robot 2 Mow App, you'll have everything you need to keep your lawn looking its best, so download it today!

Did this answer your questions?

Thank you for your feedback

FAQ's
Changing the MowRo Blades

When your MowRo lawn mower blades become dull, it's time to replace them. The best time to replace is when grass shows prominent white edges after mowing or the mower makes excessive vibration noises.

Blades have two edges and two sides. You can extend the life of your blades by turning them over, but eventually, you will need to replace them. When grass shows prominent white edges after mowing or the mower makes excessive vibration noises.

This is a simple process, but there are a few things to keep in mind. 

First, always wear gloves when working with blades. They are sharp and can easily cause injury. 

To replace the blades, you will need to unscrew the three retaining screws.

Once the screws are removed, you can take off the old blades and put on new ones.

Be sure to hand-tighten the screws to avoid stripping the threads.

That's all there is to it! With new blades, your lawn mower will work like new again.

Did this answer your questions?

Thank you for your feedback

FAQ's
How MowRo Works

The MowRo robot mower is an automatic lawn care robot that takes care of your lawn for you. All you need to do is install the MowRo and program it to suit your specific needs. You can manually program it from the control panel installed in the unit or use the app on your smartphone.

Navigation

MowRo features a perimeter wire placed around your lawn to keep the mower contained. The wire is laid on the ground or dug a few centimeters into the soil. It helps the MowRo know where it's going and detect the docking station. 

The mower will move around the lawn, cutting the grass in a random pattern as it goes. The random pattern helps stop any visible tracks from forming on the grass. It is also equipped with a safe backup bumper that reroutes the mower in a more favorable direction to continue mowing if it bumps into objects like trees, curbing, or even kids playing around. 

Charging System

The MowRo mower runs on lithium-ion batteries designed to hold and discharge large amounts of current for high-power applications. It automatically recharges on the docking station guided by the perimeter. Just make sure that the wire path is clear, and the docking station is on the ground. After recharging, it goes back to cutting according to the schedule you programmed.

Cutting System

MowRo robot mowers are known for their quiet operation while cutting. It utilizes three cutting blades with a cutting width of 9.5" to increase efficiency and cutting height from 0.1" to 2.5". 

Customize the grass height on your lawn with the adjustable cutting height ranging from 0.1" to 2.5".  

They also cut more frequently, leaving behind short grass clippings that act as natural fertilizers for your lawn. It is convenient and healthy for the lawn.

Did this answer your questions?

Thank you for your feedback

FAQ's
Setting MowRo Scheduling

For the MowRo RM24 mower to properly operate on a schedule, you will need to set the time on the mower’s clock. The clock is formatted in military time, so it is important to be aware of this when setting the time. 

To set the clock for the RM24: 

1) Unlock the mower. (If locked, see steps 1-7 in the Unlocking the Mower section.)

2) Press the “Set” button until the clock icon is showing at the top of the LCD screen. 

3) Upon reaching the clock icon, your screen will display four zeros, with the first zero blinking. 

4) From this screen, you can switch between the zeros by pressing the “OK” button. 

5) To set the time, shift to the desired zero and use the up and down arrow buttons to increase or decrease the number. 

6) When complete, toggle to the end of all the numbers until none of them are blinking.

7) Press “Set” to save time. 

 Another advanced product offered by Redback is the RM24-SMRT. The RM24-SMRT is the smart counterpart of MowRo's RM24 robot mower. It is accessible on an app called Robot 2 Mow where you can set a schedule for your RM24-SMRT to follow.

To set the clock for RM24-SMRT:


  1. Choose your preferred cutting dates and times.
  2. Press “SET DONE” when you're sure of the schedule.
  3. Use the back arrow. 

It is important to make sure the clock is set correctly so that the mower operates on a schedule. By following these steps, you can be confident that your mower will be running smoothly and on time. 

Did this answer your questions?

Thank you for your feedback

FAQ's
Rain Sensor Feature

The rain sensor feature on MowRo Robot Mower is convenient for those who worry about their robot mower getting wet in the rain. The mower will automatically return to its docking station with rain sensor technology once it senses rain or any water like sprinkles. It will then return to the docking station and wait for the next scheduled mow. If it gets interrupted, you need to wait for 2 days.

You don't have to worry about it getting damaged or wet. This feature is excellent for those who live in areas with unpredictable weather, as it ensures that your mower will always be working in pristine conditions.

Did this answer your questions?

Thank you for your feedback

FAQ's
Pin Security Code

It is important to set a security pin for your lawn care device. This will ensure that no one but you can access the device and use it. Here are instructions on how to set your pin: 

1) Unlock the mower. (If locked, see steps 1-7 in the Unlocking the Mower section.)

2) Press the “Set” button until the lock icon shows on the top of the LCD screen.

3) Upon reaching the lock icon, your screen will display four zeros, with the first zero blinking.

4) From this screen, you can switch between the zeros by pressing the “OK” button.

5) To set your PIN, shift to the desired zero and use the up and down arrows located on the “Home” and “Start” buttons to set the number.

6) Repeat steps four and five for all remaining numbers.

7) Once you have entered your desired PIN, press the “OK” button to toggle through all the numbers until none of them are blinking.

8) Press “Set” to save your PIN. The lock icon should now be gone from the top of the screen. 

By following these steps, you can ensure that your lawn care device is secure and only accessible by you.

Did this answer your questions?

Thank you for your feedback

FAQ's
Yard Size Programming

When measuring your lawn, you want to be as accurate as possible. After all, you don't want your mower running off outside your property. To measure your lawn:

  1. Start by walking around the lawn's perimeter.
  2. Use a measuring tape or other measuring tools to get the length and width of your lawn.
  3. Once you have those measurements, multiply the length by the width to get the square footage of your lawn. 

Now that you have the square footage of your lawn, you can start programming your mower to mow a specific area. Here are the steps to programming the MowRo: 

1) Unlock the mower.

2) Press the "Set" button until the meters squared icon is shown at the top of the LCD screen. 

3) Use the up and down arrows located on the "Home" and "Start" to increase or decrease the mowing area. 

4) Tap the "Set" button to save the mowing area.  

 And that's it! You've now programmed your mower to mow a specific area. This is great for making sure your mower doesn't go off the edge of your lawn and into your neighbor's yard.

Did this answer your questions?

Thank you for your feedback

FAQ's
MowRo: The Robot Mower Is Not Charging

If you have a MowRo Robot Mower, but it's not charging, don't despair! You can take a few simple steps to try and fix the problem.

Tip #1: Extension Cord Or Power Cord

Ensure the docking station receives power and is connected to a functioning outlet. If the outlet is operational, but the docking station still has no light and no power, please disconnect the extension cord (the cord without the power block) and try again.

If this resolves the issue, you can request an extension cord by filling out this form. However, if the problem persists, please let us know, and we will send you a replacement power cord.


Note: You don't need a green light on the docking station to get the MowRo to charge.

Tip #2: Red Flashing Light

First, ensure the MowRo is fully pushed into the docking station and that the contacts of the MowRo are lined up and touching the charging contacts on the docking station. 


Second, ensure both contacts on the MowRo and Docking Station are clean. Remove debris with a steel wire brush, steel wool (brush lightly), cloth, or similar items. 


Tip #3: MowRo Has Not Left Docking Station


If you have power to your docking station and your MowRo has not left for multiple days, do the following:

  1. Make sure the MowRo is turned on and has power.
  2. Check that the MowRo's rain sensor is NOT engaged.
  3. Ensure there is no red light because it means that the wire is broken. The mower will not operate with a damaged or broken wire. 
  4. Verify that there is power to the Docking Station.
  5. Ensure the MowRo is fully pushed into the Docking Station for proper connection of contacts on both robots and the docking station.
  6. Clean the MowRo and Docking Station contacts to ensure no residue or debris is blocking the connection.
  7. Make sure that there are no Error Codes on the MowRo display.
  8. Check the battery life of your MowRo to ensure it has enough power to charge properly.
  • If the black screen or MowRo won't turn on, store the docking station and MowRo in a dry area (garage, shed, etc.) for a few days. It allows moisture to evaporate from the robot and can help resolve any connection issues.
  • If the battery life stays at the same level constantly, your battery will not charge, and you will need a replacement battery.

Did this answer your questions?

Thank you for your feedback

FAQ's
E12: MowRo Error Code

Code Description

E12 error code means the robot mower does not have enough grip or traction on the surface.

Common Causes

The primary cause of this error message is that the surface of the lawn is too wet or slippery. It can also be because of holes, mud or sand.

Solution

  1. Check the area to ensure that the lawn is level and there is no loose ground. Once the issue has been resolved, manually restart the mower from its docking station.
  2. Inspect if there are holes in the grass or uneven surfaces that might affect the mower's traction. If needed, level the ground so that your mower can move around easily.
  3. Suppose the solutions above don't resolve your issue. In that case, you can submit a form if the device is still under manufacturer warranty. Remember to provide your order number, the device serial number, and a video of the problem when submitting the claim.


    Did this answer your questions?

    Thank you for your feedback

    FAQ's
    E11: MowRo Error Code

    Code Description

    The E11 error code indicates a tilt sensor-triggered error. It occurs when the robot mower's tilt sensors detect an angle outside of its operating range.


    Possible Cause

    It can be caused by uneven ground or foreign objects that cause the robot mower to tilt more than it should.


    Solution

    1. Check the area where the robot mower is located for any foreign objects that may have caused the tilt. If there are any, remove them and make sure the terrain is even before restarting the mower.
    2. Level the area out as much as possible and manually restart the mower from the docking station.
    3. Suppose the solutions above don't resolve your issue. In that case, you can submit a form if the device is still under manufacturer warranty. Remember to provide your order number, the device serial number, and a video of the problem when submitting the claim.

    Did this answer your questions?

    Thank you for your feedback

    FAQ's
    E10: MowRo Error Code

    Code Description

    Error code E10 indicates that the voltage of the battery is low.


    Possible Cause

    The most common cause of this error is an insufficiently charged battery. As the robot mower works, its battery drains more and more until it reaches a critical level.


    Solution

    1. Remove the MowRo from the docking station and place it back once fully charged. To do this, ensure your docking station has power and a flashing green LED.
    2. You can also check the battery life status by turning on your MowRo, pressing the set button, and checking the LCD screen on the right side. The battery life is represented by four bars, with one indicating the lowest charge and four representing the highest charge.
    3. If none of the solutions mentioned above haven't resolved your issue, you have two options:
      1. If your device is still under manufacturer warranty, you can submit a warranty request by filling out a form. Remember to provide your order number, the device serial number, and a video of the problem when submitting the claim. 
      2. You can replace the battery on your MowRo.

    Did this answer your questions?

    Thank you for your feedback

    FAQ's
    E9: MowRo Error Code

    Code Description

    The error code E9 is an alert that indicates an issue with the battery.


    Possible Cause

    The most likely cause of this issue is an insufficient charge in the battery. It could also be caused by a problem with the circuitry of the battery itself or debris or corrosion that has built up over time.


    Solution

    1. Check the charge of the battery. If it is low, set the MowRo to the docking station and charge it for a few hours.
    2. If the battery is sufficiently charged, turn over the mower, unscrew the battery cover, and verify that the battery is inserted all the way. Take out the battery and ensure nothing is blocking the battery or causing corrosion. If everything looks good, re-insert the battery to see if the issue has been resolved.
    3. If none of the solutions mentioned above haven't resolved your issue, you have two options:
      1. If your device is still under manufacturer warranty, you can submit a warranty request by filling out a form. Remember to provide your order number, the device serial number, and a video of the problem when submitting the claim. 
      2. You can replace the battery on your MowRo.

    Did this answer your questions?

    Thank you for your feedback

    FAQ's
    E8: MowRo Error Code

    Code Description

    The E8 error code is an indication of overcurrent on the cutting motor.


    Possible Cause

    The cutting motor may receive more than the required amount of power, causing it to become overloaded and shut off. The grass may also be too tall for the MowRo.


    Solution

    1. Adjust the cutting height of the cutting blade. A low cutting height may also cause this error. If it is set too low on the ground/dirt or puts out more power to cut, it may turn off more often.
    2. Mow the grass down to the recommended height with a traditional mower if it is too tall or thick. Once the grass is mowed down, restart the MowRo by placing it in its docking station and pressing the START button.
    3. If none of the solutions mentioned above haven't resolved your issue, you have two options:
    1. If your device is still under manufacturer warranty, you can submit a warranty request by filling out a form. Remember to provide your order number, the device serial number, and a video of the problem when submitting the claim. 
    2. You can replace the cutting motor on your MowRo.

    Did this answer your questions?

    Thank you for your feedback

    FAQ's
    E7: MowRo Error Code

    Code Description

    When the E7 error code, it indicates an overcurrent on the right propulsion motor.


    Possible Cause

    It can be caused by several issues, such as blocked or damaged drive wheels or damage to the right motor itself. The grass may also be too tall for the MowRo, which can cause it to lose traction and stall.


    Solution

    1. Mow the grass down to the recommended height with a traditional mower if it is too tall or thick. Once the grass is mowed down, restart the MowRo by placing it in its docking station and pressing the START button.
    2. If none of the solutions mentioned above haven't resolved your issue, you have two options:
    1. If your device is still under manufacturer warranty, you can submit a warranty request by filling out a form. Remember to provide your order number, the device serial number, and a video of the problem when submitting the claim. 
    2. You can replace the wheel motor on your MowRo.

    Did this answer your questions?

    Thank you for your feedback

    FAQ's
    E6: MowRo Error Code

    Code Description

    When the E6 error code, it indicates an overcurrent on the left propulsion motor.

    Possible Cause

    It can be caused by a number of issues, such as blocked or damaged drive wheels, or damage to the left motor itself. The grass may also be too tall for the MowRo, which can cause it to lose traction and stall.

    Solution

    1. Mow the grass down to the recommended height with a traditional mower if it is too tall or thick. Once the grass is mowed down, restart the MowRo by placing it in its docking station and pressing the START button.
    2. If none of the solutions mentioned above haven't resolved your issue, you have two options:
      1. If your device is still under manufacturer warranty, you can submit a warranty request by filling out a form. Remember to provide your order number, the device serial number, and a video of the problem when submitting the claim. 
      2. You can replace the wheel motor on your MowRo.

    Did this answer your questions?

    Thank you for your feedback

    FAQ's
    E5: MowRo Error Code

    Code Description

    When the collision sensor is triggered on your Redback MowRo Robot Mower, Error Code E5 will display. This code indicates that the mower has encountered an object and must reroute to safety.

    Possible Cause

    The collision sensor on your mower is designed to detect objects or obstacles in the mower's path and trigger an error code. This could be a large rock, an uneven surface, a thick patch of grass, or even children or pets running around the lawn.

    Solution

    1. Ensure that the path of the mower is clear of any obstacles. Inspect your lawn and remove any objects that may be in the way. If possible, adjust the boundary wire on your mower so it excludes this section from its route.
    2. Create a boundary that keeps out any area or object that you do not want the mower to run over.
    3. Make sure that the sensors are properly attached to the front of the MowRo.
    4. If the error code continues to appear in the same area, verify that all sensors are still intact and functioning properly. If a sensor is broken, replace the upper cover of your mower. You can order that part on the Redback Tools website.
    5. If none of the solutions mentioned above haven't resolved your issue, you have two options:
      1. If your device is still under manufacturer warranty, you can submit a warranty request by filling out a form. Remember to provide your order number, the device serial number, and a video of the problem when submitting the claim. 
      2. You can replace the battery on your MowRo.

    Did this answer your questions?

    Thank you for your feedback

    FAQ's
    E4: MowRo Error Code

    Code Description

    The E4 error code on the MowRo indicates a malfunction with the boundary line signal.

    Possible Cause

    It could be due to several things, such as a damaged wire, cut wire, disconnected t-clips, a non-functional boundary generator, or an incorrect setting in the robot mower's software.

    Solution

    1. Check the perimeter wire to ensure that it is not cut. A voltage tester can help you locate where the cut is if there are any.
    2. Remove the blue t-clips and strip the wire cover to expose the wire. Connect both ends of the exposed wires to the prongs in the back of the station and observe any changes in green or red light that appear.

    Green Light- Replace or tighten the blue t-clips to resolve the issue.

    Red Light- Get an extra wire and cut a short section. You can use extra wire from your wire roll when you strip it. Strip the wire cover so the wire is exposed, and connect both ends of this wire to the prongs on the back of your station. If it still appears red, replace your docking station before continuing. If it turns green, the wire and t-clips will likely be the issue and must be replaced. You can get a replacement by filling out a form if it is still under warranty. Purchase a new one if it's not on warranty anymore.


    1. Suppose the solutions above don't resolve your issue. In that case, you can submit a form if the device is still under manufacturer warranty. Remember to provide your order number, the device serial number, and a video of the problem when submitting the claim. 

    Did this answer your questions?

    Thank you for your feedback

    FAQ's
    E2: MowRo Error Code

    Code Description

    The E2 error code indicates that the lift sensor has been triggered.

    Possible Cause

    The most common reason for this error is that the mower was lifted. If not, some foreign object could be blocking the wheel from working.

    Solution

    1. Check if the MowRo was lifted and set it back down.
    2. Check for any foreign objects, such as sticks or stones, blocking the wheel from working. If present, remove them carefully.
    3. Grease the front wheels of the MowRo with a small amount of grease to ensure they can move freely. To grease the MowRo’s front wheels, you will need an aerosol grease with a small spray “straw.”
      1. Flip the MowRo over.
      2. Lift the front wheel.
      3. Insert the “straw” under the rubber gasket.
      4. Spray the grease.
      5. Push the front wheel upward and downward to ensure the grease reaches the inside bushing.
      6. Repeat the steps with the other wheel.
      7. Once both wheels have been greased, flip the MowRo back over, place MowRo back in the docking station, and manually start it. 
    4. If your mower continues to have the E2 error constantly after it has been greased, you may need a new bushing if the existing one is old and out of warranty. Purchase a bottom cover with a new bushing on our site.
    5. If none of the solutions mentioned above haven't resolved your issue, you have two options:
      1. If your device is still under manufacturer warranty, you can submit a warranty request by filling out a form. Remember to provide your order number, the device serial number, and a video of the problem when submitting the claim. 
      2. You can replace the faulty part on your MowRo.

    Did this answer your questions?

    Thank you for your feedback

    FAQ's
    E3: MowRo Error Code

    Code Description

    Error Code E3 indicates that the mower has moved out of its boundary line perimeter. The boundary wire is a virtual fence to keep the robot mower operating within its designated area.

    Possible Cause

    This error code can be caused by a boundary line that is cut or not set up correctly. A ground with dips or hills may also cause the mower to slide down.

    Solution

    1. Verify that the boundary line is intact and not cut by checking if the light on the docking station is Green. If the light is Red and flashing, you may need to re-do the boundary installation.
    2. Ensure the t-taps connection at the back of the docking station has not been interchanged incorrectly.
    3. Check that the boundary line is set up correctly with no sharp angles or curves.
    4. Ensure that the ground leading into and out of the mowing area is even, without dips or hills.
    5. Relocate the MowRo in the boundary line perimeter, then manually restart the MowRo by pressing the set button, typing in your MowRo passcode, and pressing the START button.
    6. Suppose the solutions above don't resolve your issue. In that case, you can submit a form if the device is still under manufacturer warranty. Remember to provide your order number, the device serial number, and a video of the problem when submitting the claim.

    Did this answer your questions?

    Thank you for your feedback

    FAQ's
    E1: MowRo Error Code

    Code Description

    The E1 error code is triggered when the STOP button has been engaged. 

    Possible Cause

    The most common reason for the E1 error code to display is that something is preventing the STOP button from releasing. It could be a foreign object, such as a stick or a rock, that is keeping the button pressed down. It could also be a zip tie that is holding the STOP button. Upon purchase, pin code instructions are zip tied to the STOP button. Failing to remove the zip tie will cause the MowRo not to work.

    The button may also be stuck. It can also happen if the STOP button is held down for too long or not pressed properly. 

    Solution

    1. Inspect the area around the STOP button to ensure nothing prevents it from releasing. Remove any objects if found. 
    2. If nothing prevents the button from releasing, then carefully press and hold down the STOP button, ensuring that you do not hold it down for too long. 
    3. Manually restart your mower in the docking station.

    Did this answer your questions?

    Thank you for your feedback